
Using Realtime Indicators
Guide on how to add realtime indicators to diagrams
Realtime indicators help make your diagrams more readable. They are small colored shapes, backgrounds, or texts you can associate with shapes in your diagram. They can represent different states and their colors allow users to quickly scan diagrams for an informational overview.
This document explains how to add realtime indicators to your diagrams.
Configure realtime indicatorsBefore using the realtime indicators feature in Designer, make sure your ServiceNow admin has configured realtime indicators correctly. See Realtime indicators for information on the configuration process.

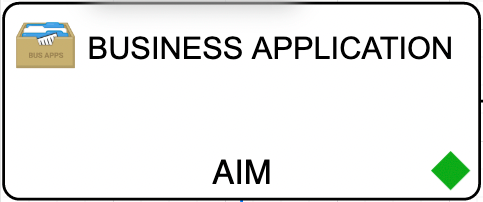
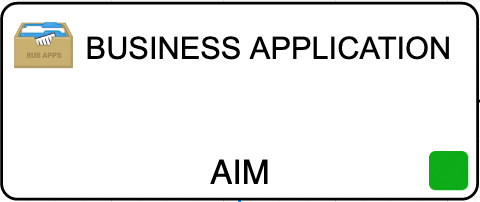
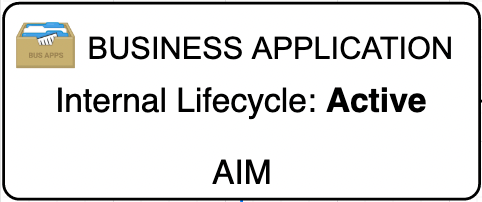
Diagram with realtime indicators applied
Realtime indicators UI
In Designer, you create and edit realtime indicators via the ribbon above the canvas. The indicators available to you are based on those configured by your ServiceNow admin.

- To create realtime indicators select the Insert tab. See Adding realtime indicators for more information.
- To adjust existing realtime indicators select the Indicators tab. See Adjust existing realtime indicators for more information.
Adding realtime indicators
- Select INSERT from the top ribbon.
- The insert menu pops up, select Realtime Indicators.
- Select the table, field, and view for the realtime indicator you want to add.

- Select the ADD INDICATOR button.

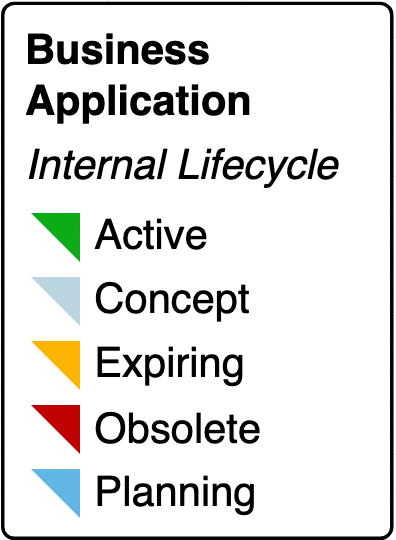
Types of realtime indicators
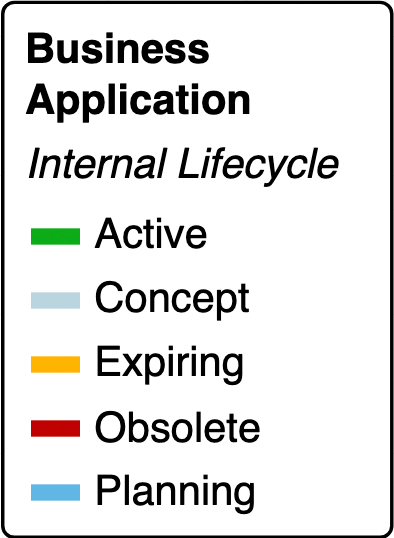
- Background: Adds a colored background to relevant tables in the diagram.

- Border: Adds a colored border around each relevant tables in the diagram.

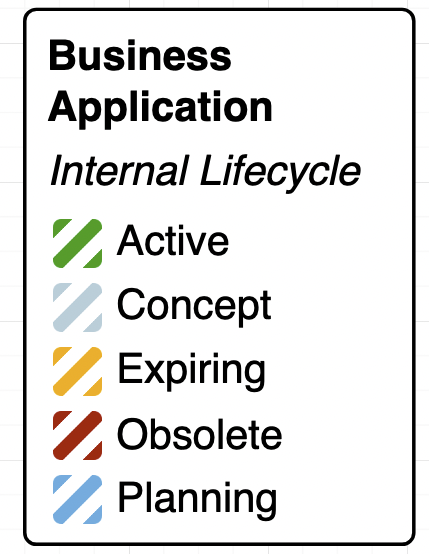
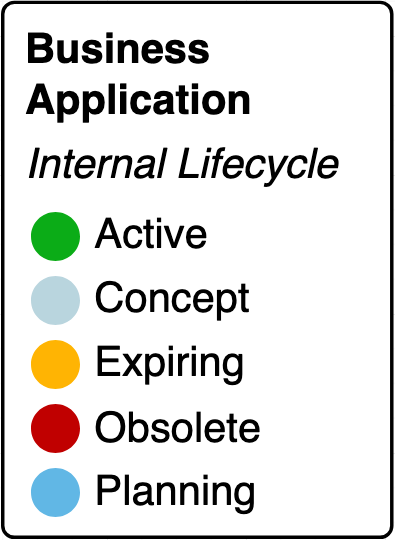
- Circle: Adds a small circle to the top right corner of relevant tables diagram.

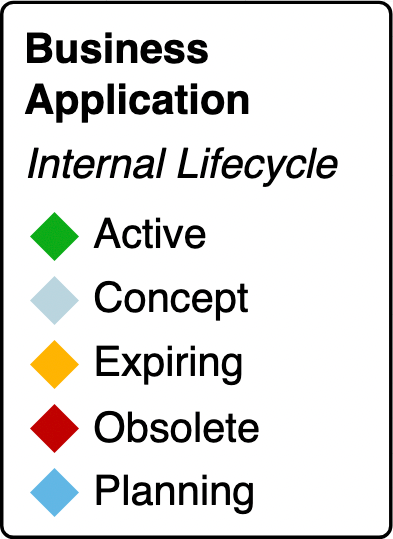
- Rhombus: Adds a colored rhombus circle to the top right corner of relevant tables in the diagram.
- Square: Adds a small colored square to the top right corner of relevant tables in the diagram.

- Text: Adds text describing the indicator to each relevant table in the diagram.
- Triangle: Adds a small circle to the top right corner of relevant tables in the diagram.

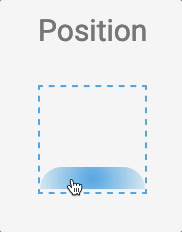
Set realtime indicators' position
In Designer you can choose a position and orientation of realtime indicators.
To adjust the position:
- Hover your cursor over the Position box. Here you can choose where the indicator is placed inside or outside the element.

- Select your preferred position for the realtime indicator.
To set the orientation of the realtime indicator:
-
Select Add Indicator.
-
Select either the left-to-right or right-to-left orientation for indicators with horizontal positions.

- Select either top-to-bottom or bottom-to-top orientations for indicators with vertical positions.

To add the realtime indicator to your diagram:
- Select Add Indicator.
Adjust existing realtime indicators
Designer has options to edit existing realtime indicators and hide or remove them. These are accessed via the indicators tab in the menu ribbon.

Edit existing realtime indicators:
After selecting INDICATORS from the ribbon:
- Select the realtime indicator you want to adjust.

- Follow the instructions Adding realtime indicators to adjust the type, position or orientation of the realtime indicator.
- When you are ready to commit changes to the realtime indicators, select Update Indicator.
Hide realtime indicators
To hide all realtime indicators:
- Select INDICATORS from the top ribbon.
- Select the toggle button to turn off all realtime indicators.

Delete a realtime indicator
In the edit mode:
- Select the x icon for the realtime indicator you would like to remove

Updated 12 months ago